SAML Authentication Okta Side Settings
TroubleshootingSSO (SAML 2.0) Setup Guide in Okta
HireRoo supports SSO (Single Sign-On) using SAML 2.0 to enhance security. This article describes the steps for setting up SSO in Okta as the IdP side settings.
Supported Plans Enterprise
Please refer to this link for information on how to set up SSO.
1. Log in to Okta
You will need administrator account privileges, so please log in as an administrator.
2. Create Application
Click [Applications] > [Browser App Catalog], then click the "Create New App" button.
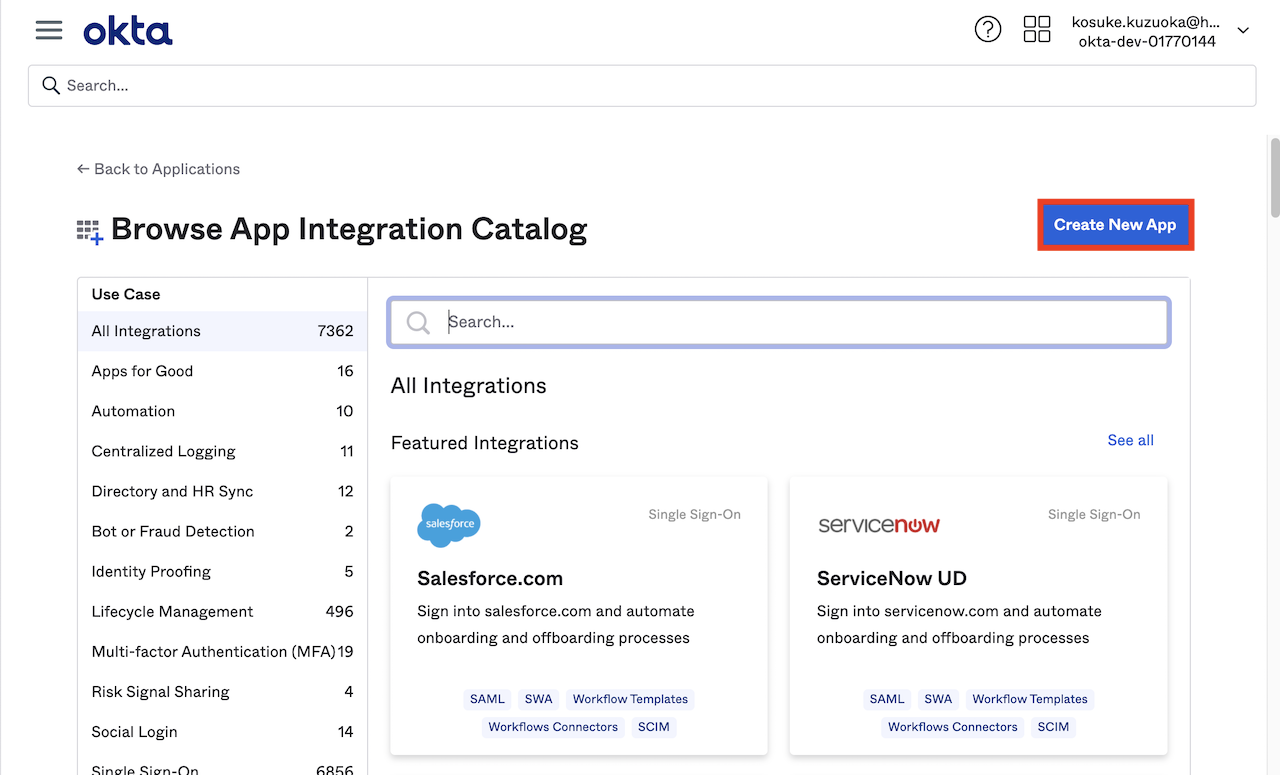
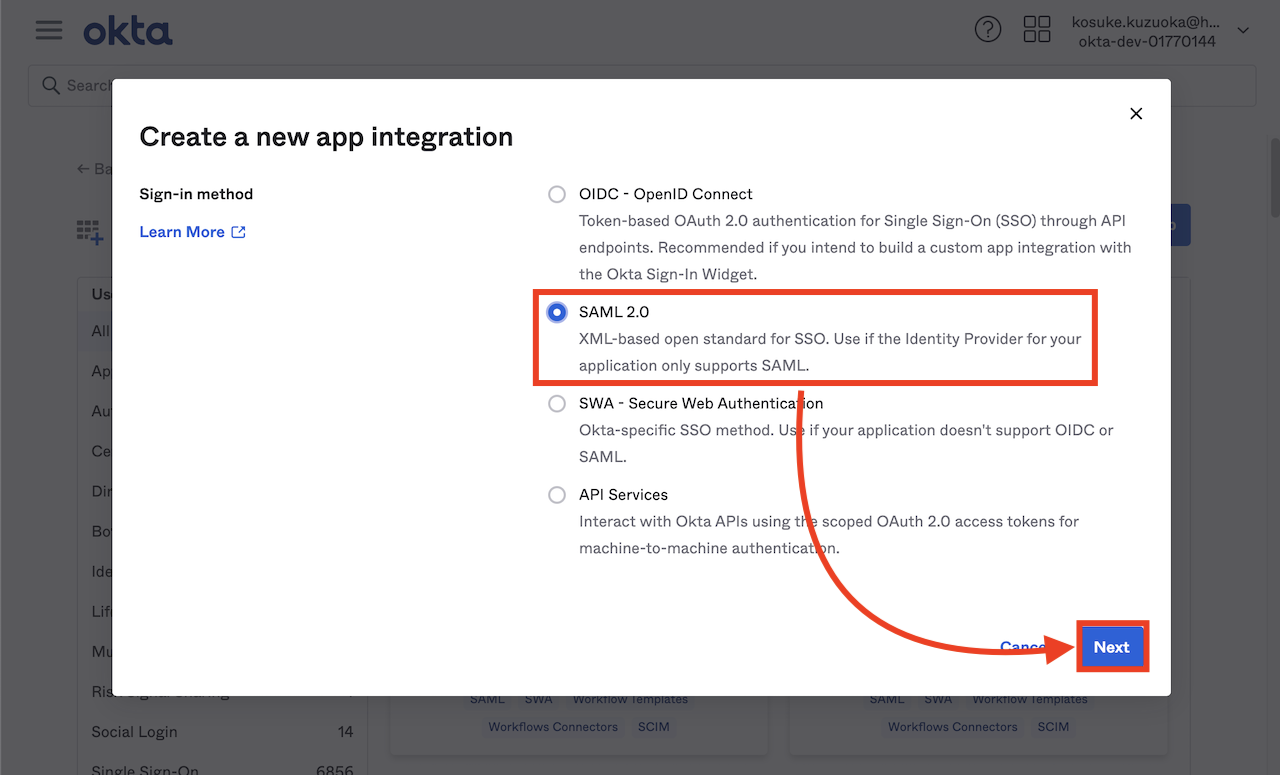
In the pop-up, select "SAML 2.0" and click the "Next" button.
Enter any app name (e.g., HireRoo) in "App name" and click "Next."
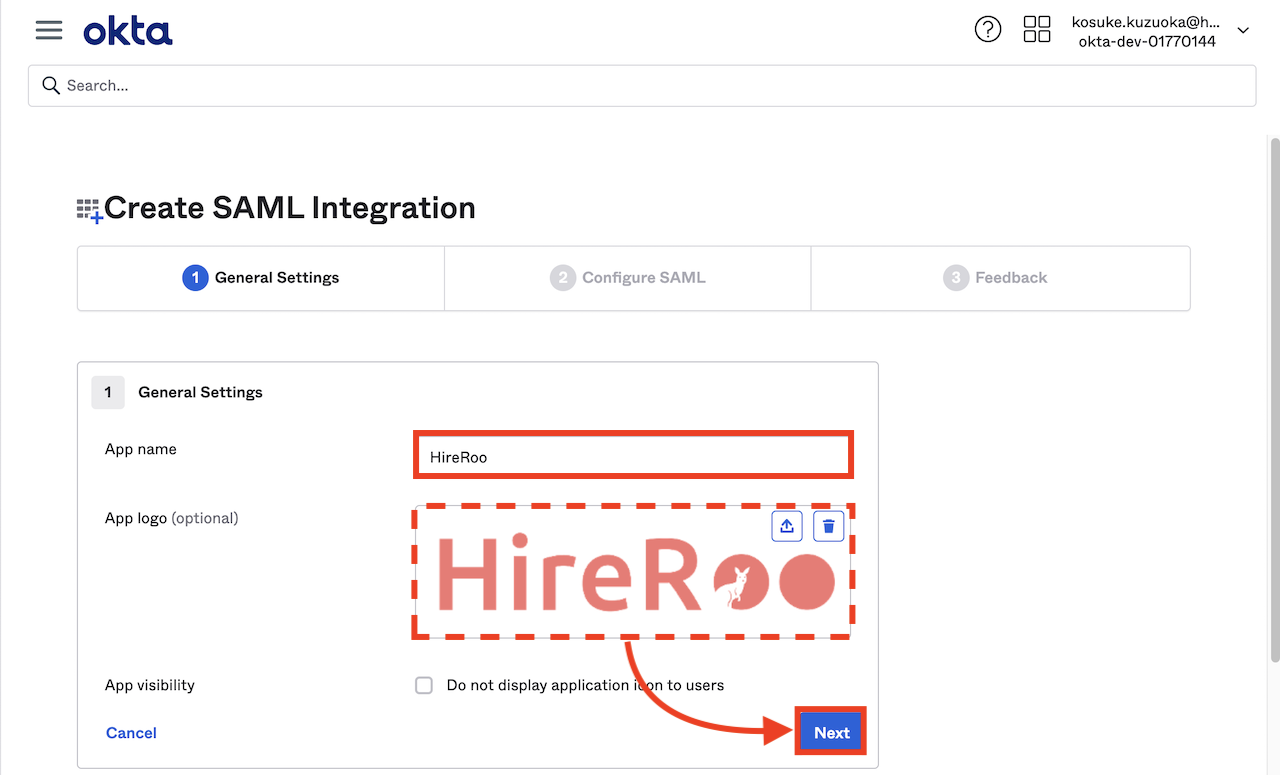
(Please use the image below for the optional logo.)

Next, set "Single sign on URL" and "Audience URI". Copy and paste the "SP Endpoint URL" and "SP Entity ID" from the HireRoo app respectively.
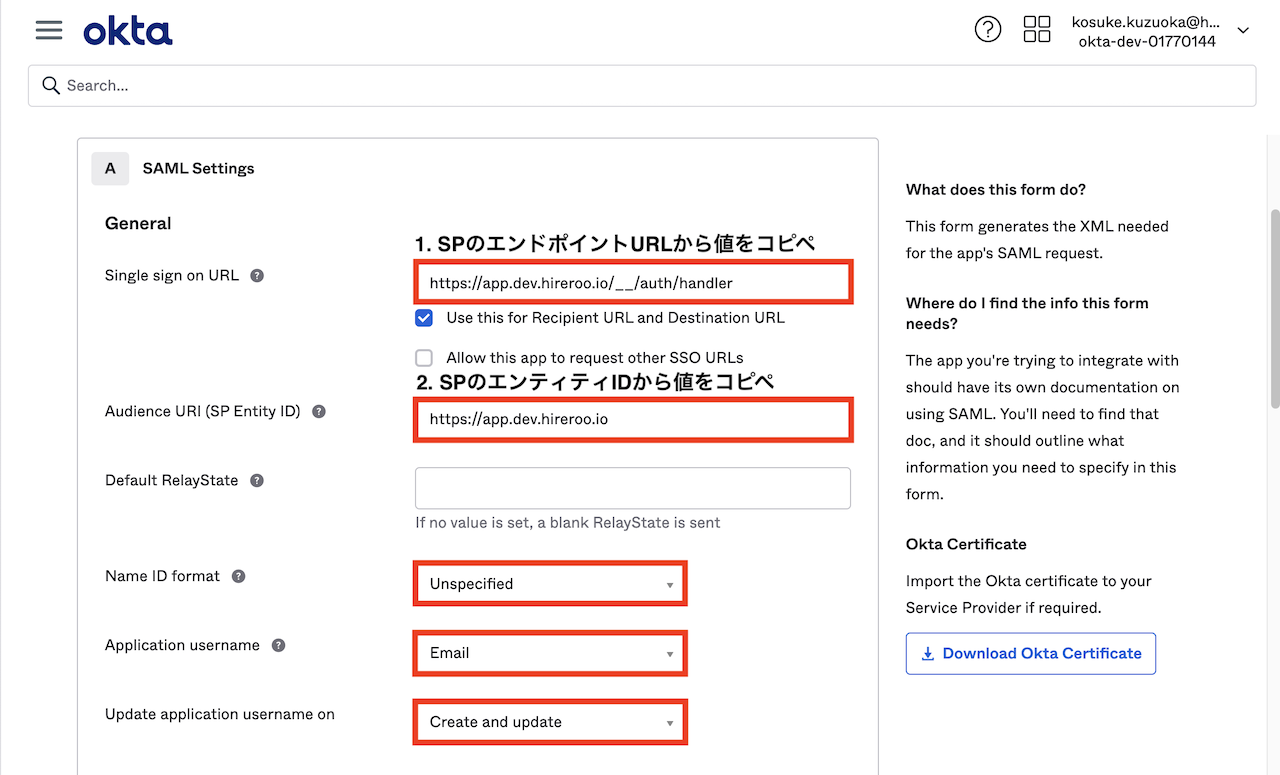
Basic Settings and Input Values
For each of the Okta settings below, enter the corresponding values.
- Single sign on URL: Copy and paste the "SP Endpoint URL" displayed on HireRoo's SSO settings screen.
- Audience URI (SP Entity ID): Copy and paste the "SP Entity ID" displayed on HireRoo's SSO settings screen.
- Default RelayState: Leave blank
- Name ID format: Select Unspecified
- Application username: Select Email
- Update application username on: Select Create and update
Important When copying and pasting, ensure that there are no extra half-width spaces before or after the text.
Next, fill in the Attributes Statements (optional) section as shown in the figure below.
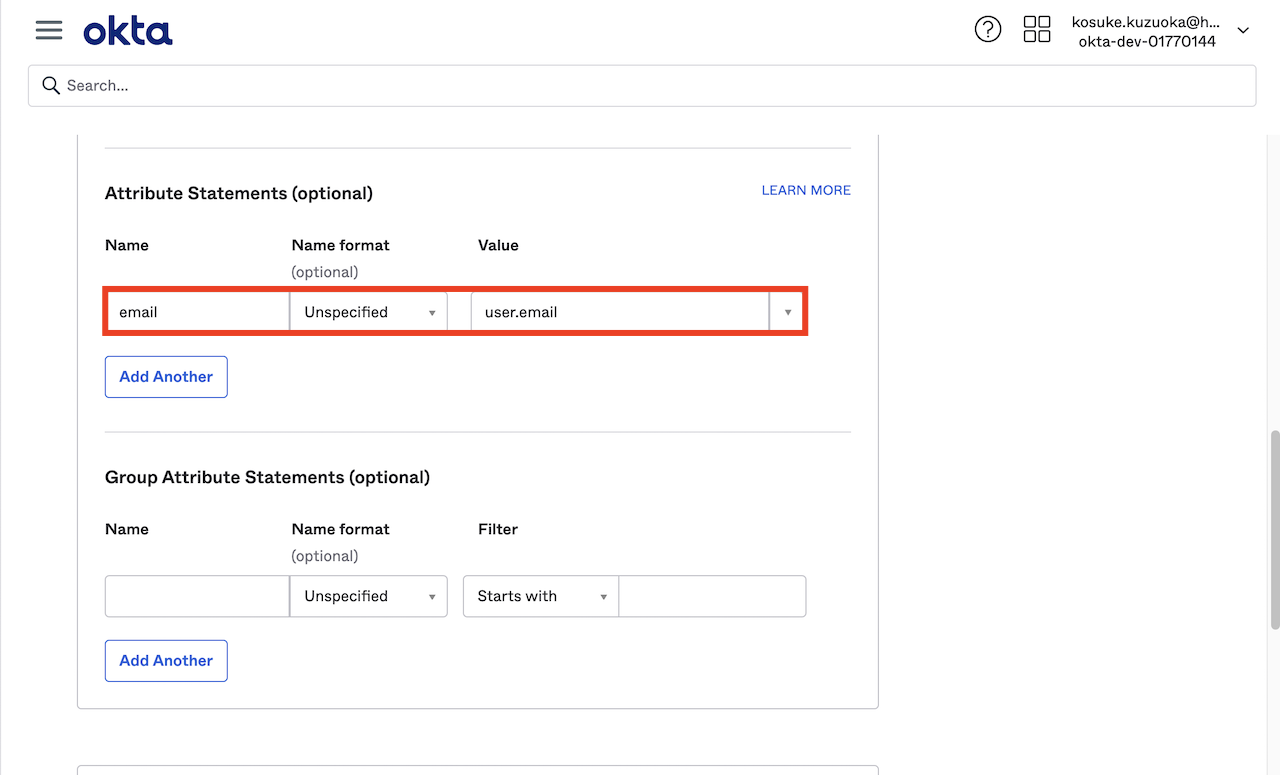
Attributes Statements Settings
- Name: Enter email
- Name format (optional): Select Unspecified
- Value: Enter user.email
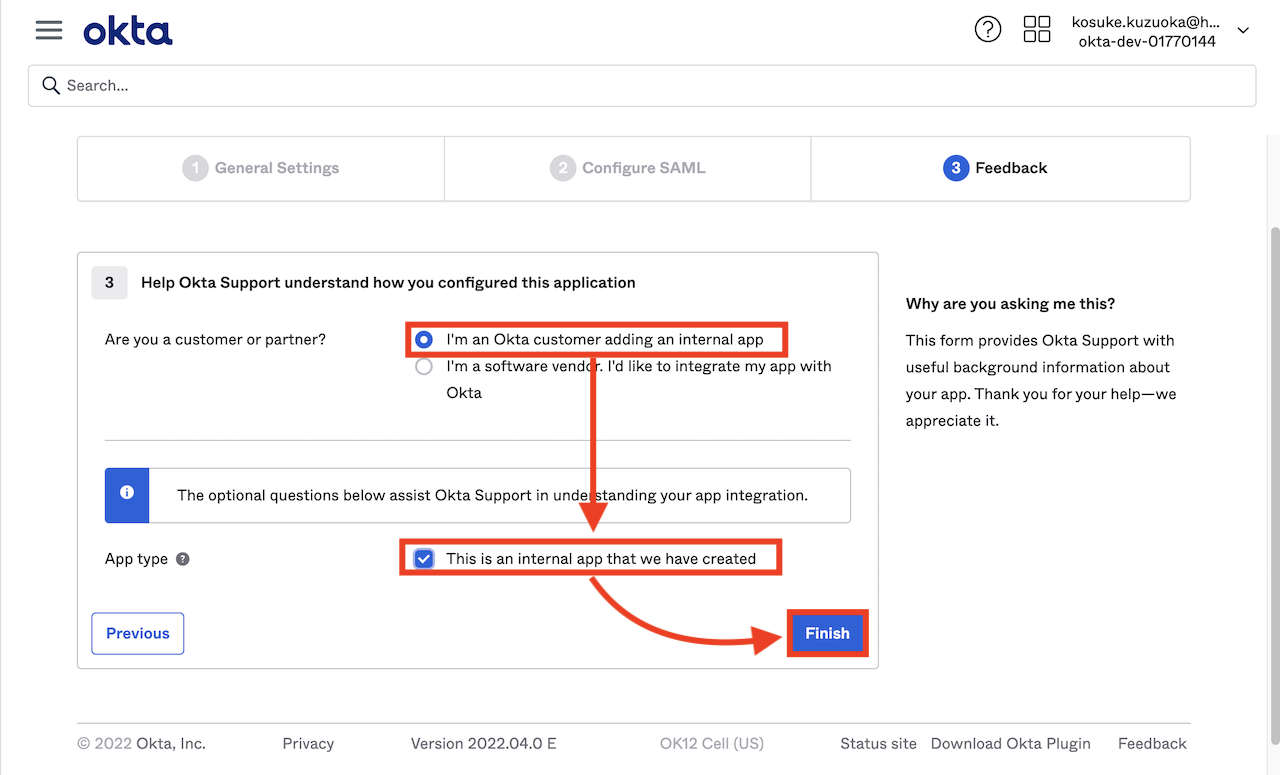
Then, click the "Next" button to jump to the final step as shown below.
Select "I'm an Okta customer adding an internal app," then check "This is an internal app that we have created" that appears afterwards, and click "Finish."
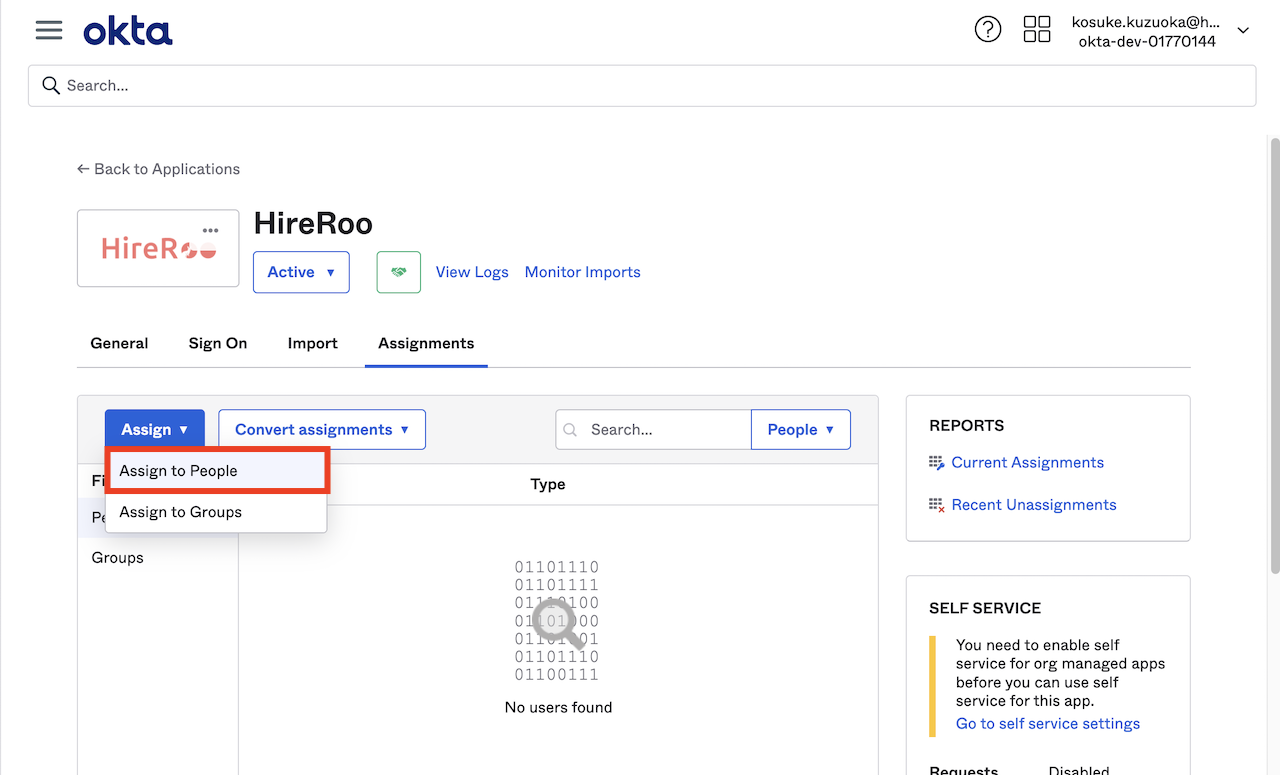
3. Assign Users
Once the screen changes, click [Assignments] > [Assign] in order to assign users who will be subject to SSO.
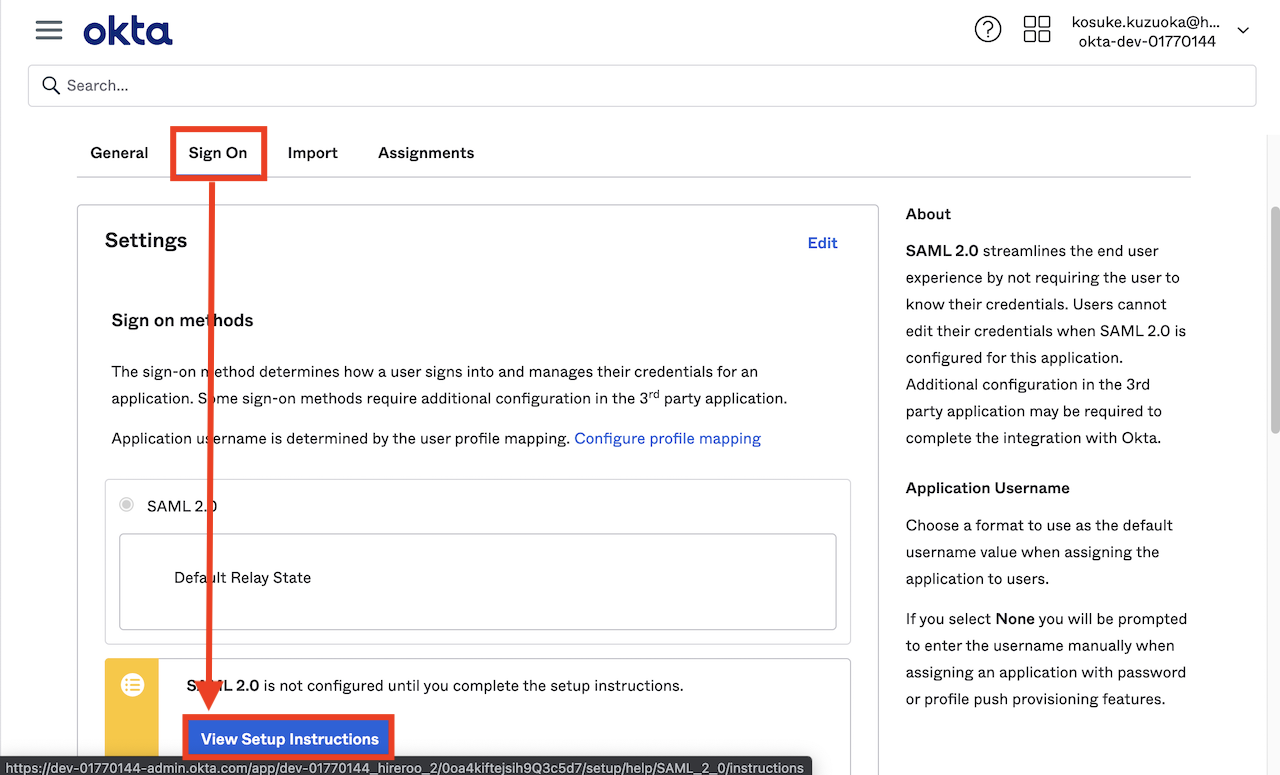
4. Register IdP Settings on HireRoo
Click [Sign On] tab > [View Setup Instructions] in order to obtain the necessary information for SSO setup on the HireRoo side.
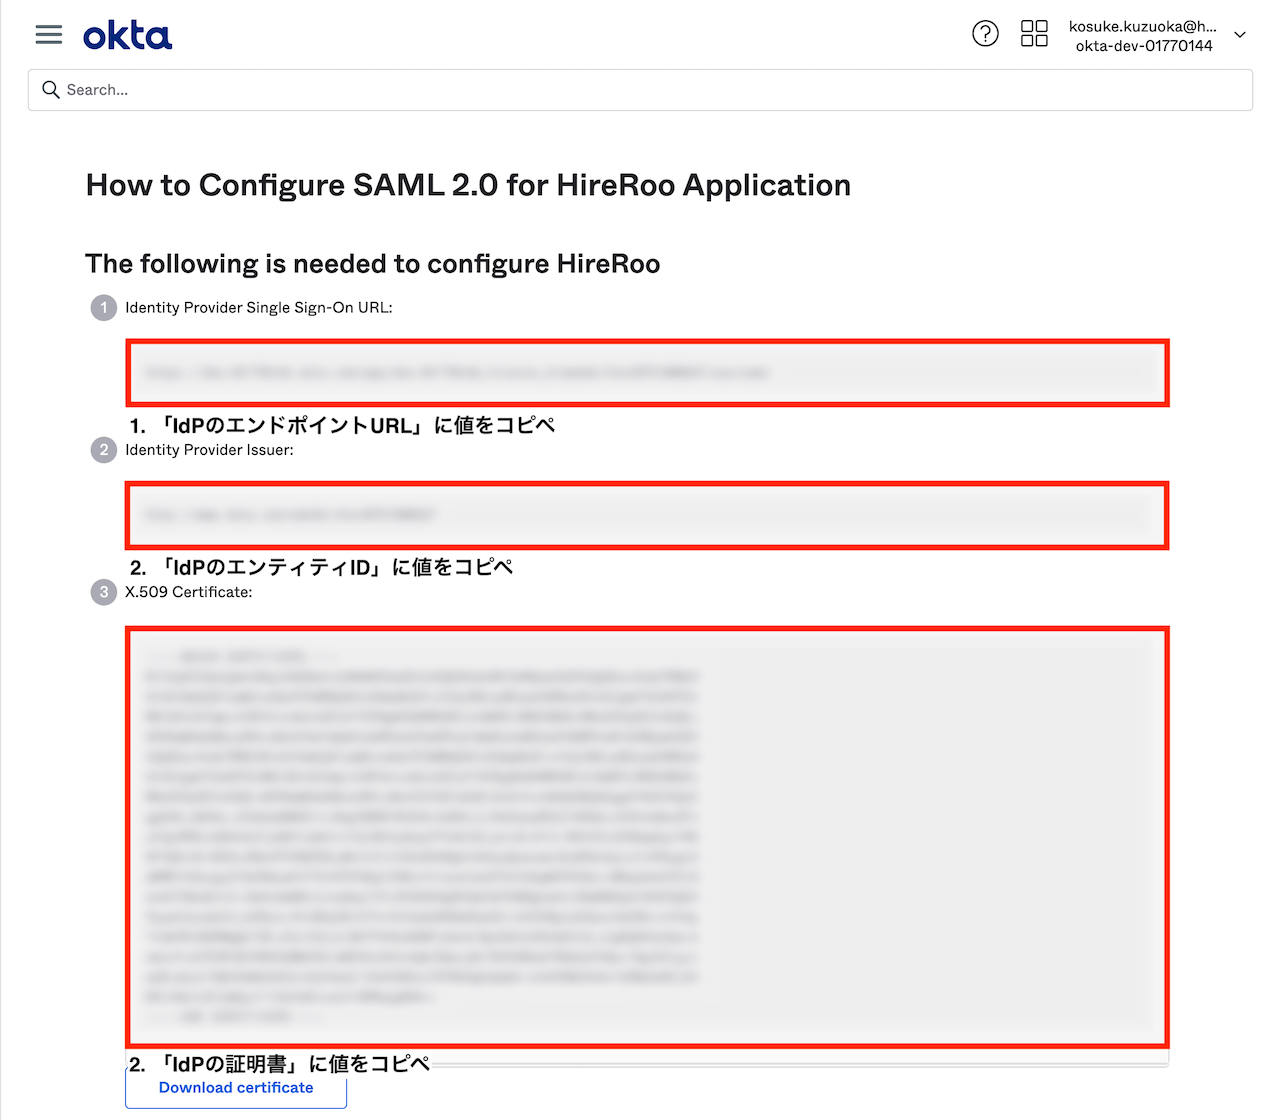
Settings for HireRoo
- Identity Provider Single Sign-On URL: Copy and paste into the "IdP Endpoint URL (SSO URL)" field on HireRoo's SSO settings screen.
- Identity Provider Issuer: Copy and paste into the "IdP Entity ID" field on HireRoo's SSO settings screen.
- X.509 Certificate: Copy and paste into the "IdP Certificate (X.509 Certificate)" field on HireRoo's SSO settings screen.
This concludes the Okta settings. Please check here for HireRoo’s settings.